Basic Shapes
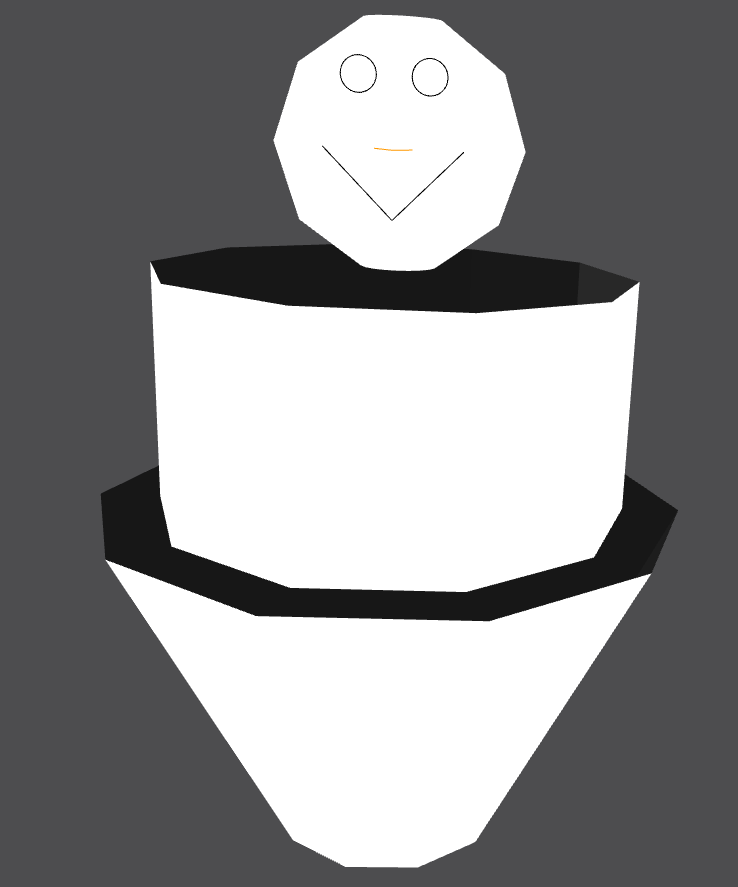
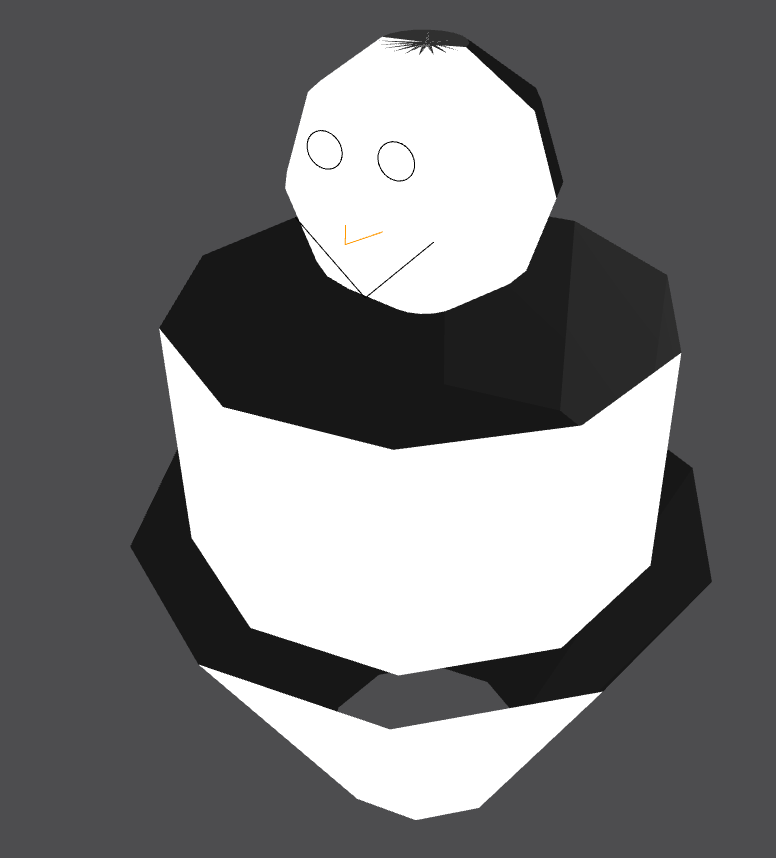
In this tutorial, we're going to go through the process of creating Blocky the Snowman; from seeing the source image, to designing the model, to coding and instancing the model itself.

Design Workflow
All JIPCAD modeling starts with an idea, optionally an image, and pencil and paper (or your preferred digital notetaking app). Many JIPCAD designs are inspired by abstract sculpture, and thus rely on publicly-available media to form an idea about what shapes their object can be broken down into. In this case, Blocky the Snowman is made out of a few different generators. See if you can find the right ones on the Generators page under the JIPCAD Language Reference.
What's Blocky made of?
One cylinder, one sphere, one funnel, two circles for eyes, and two polylines for a nose and mouth. However, you could have found different generators for the eyes, nose, and mouth than those listed--that's totally fine. In JIPCAD, there's almost always multiple ways to construct any shape, though some are easier than others.
Building Shapes
Now that we have a list of shapes, we're going to construct each individually and put them together in the next step. Note that this isn't typical; after gaining a bit more experience, users tend to create and place each generator in their intended locations before moving onto the next one. However, we're hoping to keep shape generation simple and learn a bit about instance commands, so we're going to build each shape with simple dimensions and move and scale them later.
Build a complete sphere with radius 1 and 100 segments.
Starter code:sphere id (radius theta_max phi_min phi_max theta_segs phi_segs) endsphere
For info on phi and theta, see this
sphere id (radius theta_max phi_min phi_max theta_segs phi_segs) endsphere sphere s (1 360 0 180 10 10) endsphere
Build a complete cylinder with radius 1, height 1, and 10 segments.
Starter code:cylinder id (radius height theta_max theta_segs) endcylinder
cylinder id (radius height theta_max theta_segs) endcylindercylinder cyl (1 1 360 10) endcylinder
Build a funnel with a bottom radius of 1, height of 1, 10 segments, and a ratio of top radius to bottom radius of 1.5.
Starter code:funnel id (radius ratio height segs) endfunnel
funnel id (radius ratio height segs) endfunnelfunnel f (1 1.5 1 10) endfunnel
Construct one circle with a radius of 1 and 50 segments.
Starter code:circle id (radius segs) endcircle
circle id (radius segs) endcirclecircle c (1 50) endcircle
Construct a polyline for the nose and mouth. This will require the creation of three points to form a V shape. Place the points 1 unit apart horizontally and vertically. Starter code:
point id (x y z) endpoint
polyline id ( point_idlist ) endpolyline
point id (x y z) endpointpolyline id ( point_idlist ) endpolylinepoint p1 (0 1 0) endpoint
point p2 (1 0 0) endpoint
point p3 (2 1 0) endpoint
polyline ply (p1 p2 p3) endpolyline
Now we've built a pile of shapes at the origin of our scene. But...where are they?
While our shapes now exist in our file, we have to use an instance command to display and organize them. We'll do that in the next and final step.
Instance Commands
With all shapes constructed, we now have to build Blocky the Snowman by moving and scaling our objects. We do this by utilizing commands in the instance of each shape, of which there are three: translate, which moves the shape along the XYZ axes, scale, which can shrink or expand a shape along any or all of its three axes, and rotate, which draws a vector in 3D space and moves the object around the vector a number of degrees.
Note that these expressions, like all those in JIPCAD, can take a variety of expressions as an input: any kind of integer or double (-3, 4.55563913), expressions (4/3), and certain mathematical operators (sin/cos primarily).
This is an instance command:
instance name object
[rotate (rx ry rz)(degrees)] [scale (sx sy sz)] [translate (tx ty tz)]
[surface surface_id]
endinstance
While it looks intimidating, it boils down to a simple set of variables:
- name is the name of the instance you are creating. The name of the instance must be unique from any other generator in the scene.
- object is the single object to be displayed. A single object can have multiple instances, which can be very useful.
- you can then use any, all, or none of the three commands discussed earlier. You may also use them multiple times, and the changes will occur in the order they are written.
- finally, a surface is an optional generator that colors the instance. Surfaces must be defined at the start of each scene, which is why they are frequently bundled into a single file and included at the start of each model (see the Including Files page under the JIPCAD Language Reference). If not defined, the default color is orange.
In this model, we will be using three colors, white, black, and orange:
surface W color (1 1 1 ) endsurface # White
surface B color (0 0 0 ) endsurface # Black
surface O color (1 0.6 0 ) endsurface # Orange
Getting a perfect translation and scale is a lot of guess-and-check. Don't get discouraged!
The cylinder will form the middle section for Blocky, so we should double all of its dimensions using the scale command and color it white.
instance showCyl cyl scale (2 2 2) surface W endinstance
Now that our cylinder is in place, we should move our sphere--Blocky's head--to the top of the cylinder through translation.
instance shows s translate (0 0 3) surface W endinstance
To form Blocky's base, we should scale the funnel up by three times in the z axis, giving it a stretched effect. Then we should translate it so that it's upper ring is centered around the base of the cylinder.
instance showf f scale (1 1 3) translate (0 0 -3) surface W endinstance
Good job! We've already made the base of our snowman, now we just need to add the face.

First, we're going to make Blocky's smile appear. First, we have to scale it down by half in all directions and color it black. Then we need to get it into place. The way we built his smile means that it's laying flat as of now; we have to rotate it to turn it upright.
However, this is a very simple rotate. Draw a vector straight along the x axis and rotate the smile 90 degrees; it acts the same as any normal rotation about the x axis. Then, translate the smile into position in front of Blocky's head.
However, this is a very simple rotate. Draw a vector straight along the x axis and rotate the smile 90 degrees; it acts the same as any normal rotation about the x axis. Then, translate the smile into position in front of Blocky's head.
instance showsmile ply scale (0.5 0.5 0.5) rotate (1 0 0) (90) translate (-0.5 1 2.5) surface B endinstance
Now we're going to do something similar for his nose. Here, we want his nose to be longer and sharper than his smile, so we'll want to compress the x and z axes and compress the y axis by half as much.
Then, rotate the nose 180 degrees about the x axis, move it to the center of Blocky's face, and color it orange.
Then, rotate the nose 180 degrees about the x axis, move it to the center of Blocky's face, and color it orange.
instance shownose ply scale (0.25 0.5 0.25) rotate (1 0 0) (180) translate (-0.25 1.25 3) surface O endinstance
To wrap up, we'll need to make Blocky's eyes. Here we have to do all sorts of manipulation: First, we'll need two instances, one for each eye. We'll have to shrink them to an eighth of their original dimensions, then rotate them so that they turn upright. Finally, we'll need to color them black and move them to the correct location on Blocky's face a half unit apart.
instance showc1 c scale (0.125 0.125 0.125) rotate (1 0 0) (90) translate (-0.25 1 3.5) surface B endinstance
instance showc2 c scale (0.125 0.125 0.125) rotate (1 0 0) (90) translate (0.25 1 3.5) surface B endinstance
Congrats on your first JIPCAD model! As you can see, even simple commands can quickly turn complicated and produce awesome models.

Blocky would be proud. The full code is below if you'd like to compare.
Full code for Blocky.
######### BLOCKY THE SNOWMAN ############
surface W color (1 1 1 ) endsurface # White
surface B color (0 0 0 ) endsurface # Black
surface O color (1 0.6 0 ) endsurface # Orange
sphere s (1 180 0 360 10 10) endsphere
cylinder cyl (1 1 360 10) endcylinder
funnel f (1 1.5 1 10) endfunnel
circle c (1 50) endcircle
point p1 (0 1 0) endpoint
point p2 (1 0 0) endpoint
point p3 (2 1 0) endpoint

polyline ply (p1 p2 p3) endpolyline
instance showCyl cyl scale (2 2 2) surface W endinstance
instance shows s translate (0 0 3) surface W endinstance
instance showf f scale (1 1 3) translate (0 0 -3) surface W endinstance
instance showsmile ply scale (0.5 0.5 0.5) rotate (1 0 0) (90) translate (-0.5 1 2.5) surface B endinstance
instance shownose ply scale (0.25 0.5 0.25) rotate (1 0 0) (180) translate (-0.25 1.25 3) surface O endinstance
instance showc1 c scale (0.125 0.125 0.125) rotate (1 0 0) (90) translate (-0.25 1 3.5) surface B endinstance

instance showc2 c scale (0.125 0.125 0.125) rotate (1 0 0) (90) translate (0.25 1 3.5) surface B endinstance